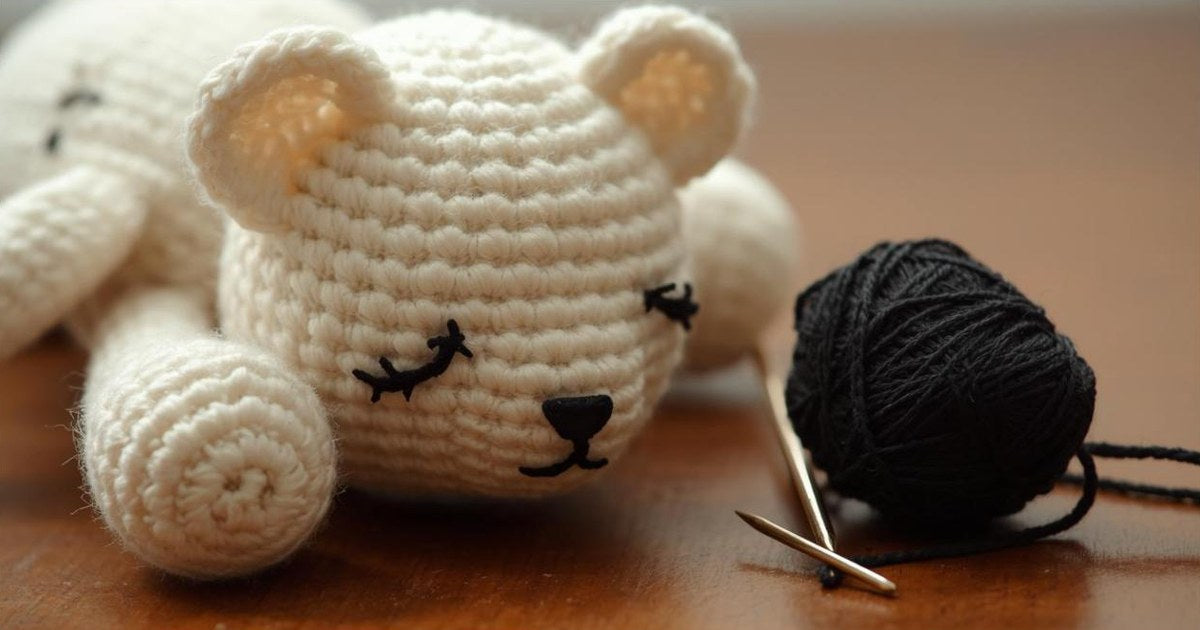
Quick answer: To embroider eyes on a crochet toy (amigurumi), thread a tapestry needle with black yarn or 6 strands of embroidery floss. Bring it up through the head from an inconspicuous spot, then wrap several straight stitches over 1–2 crochet stitches, stacking them on top of each other to build a round or oval eye. Repeat for the second eye, checking that both are level, and secure the tail inside the stuffing. Embroidered eyes are the safest option for babies and toddlers.
Embroidered eyes give crochet toys a soft, handmade look, and they're safer than plastic safety eyes for small children. Here's how to embroider eyes on crochet step by step, plus how to add highlights, eyelashes and cute sleepy eyes.
Why Embroider Eyes Instead of Using Safety Eyes?
- Safer for babies: no small parts that could come loose and become a choking hazard
- More expressive: you can make sleepy, happy, winking or oval eyes
- Flexible timing: eyes can be added after the toy is stuffed and finished
- Soft: ideal for snuggle toys and loveys
What You Need
- Black yarn (same weight or thinner than the toy) or black embroidery floss
- White floss for highlights (optional)
- A blunt tapestry needle, or a long doll needle for large heads
- Stitch markers or pins to mark eye placement
- Scissors
How to Embroider Eyes on Crochet: Step by Step
- Mark the placement. Use pins or stitch markers to mark both eyes. A common placement is between rounds 8–10 of the head, about 5–7 stitches apart. Check from the front and side before stitching.
- Start invisibly. Insert the needle where the yarn tail won't show (for example, the back of the head or where the eye will be). Leave a tail inside the stuffing.
- Make the first stitch. Bring the needle out at one side of the eye and go back in over 1–2 crochet stitches.
- Build up the eye. Repeat the stitch 4–8 times in the same holes, stacking the yarn to create a raised, round shape. Add slightly shorter stitches on top and bottom for an oval.
- Make the second eye. Travel the needle through the head to the second marker and repeat. Count stitches to keep both eyes the same size.
- Add a highlight (optional). Make one tiny white stitch in the upper corner of each eye for a lively sparkle.
- Secure. Knot the tails together inside the head or weave them through the stuffing, then trim.
Other Cute Eye Styles
- Sleepy eyes: a curved "U" or upside-down "U" made with backstitch
- Happy closed eyes: a single curved line arching upward
- Lashes: 2–3 tiny straight stitches at the outer corner
- French knot eyes: small, simple dots for tiny toys
- Felt and embroidery: sew a small felt circle and embroider the pupil on top
Tips for Even, Neat Eyes
- Always mark both eyes before you start.
- Pull gently to sink the eyes slightly into the head for a sculpted look, but not too tight.
- Keep tension even so the yarn doesn't twist.
- Use thinner thread for small toys and thicker yarn for large ones.
Frequently Asked Questions
Can you embroider eyes after stuffing?
Yes. Many makers embroider eyes after stuffing because it's easier to judge placement and shape.
What yarn should I use for crochet eyes?
Black yarn the same weight or thinner than the toy, or 6 strands of black embroidery floss.
Are embroidered eyes safe for babies?
Yes. Embroidered eyes have no small parts, which makes them the recommended choice for toys for children under 3.
How do I make both eyes the same size?
Count the number of wraps and the number of crochet stitches each eye covers, and keep them identical.
Bring Your Toys to Life
A few simple stitches can give your crochet toys real personality. For more stitch basics, see how to make French knots and how to start an embroidery stitch.
Shopping for a handmade-style gift? Browse our personalized embroidered gifts.