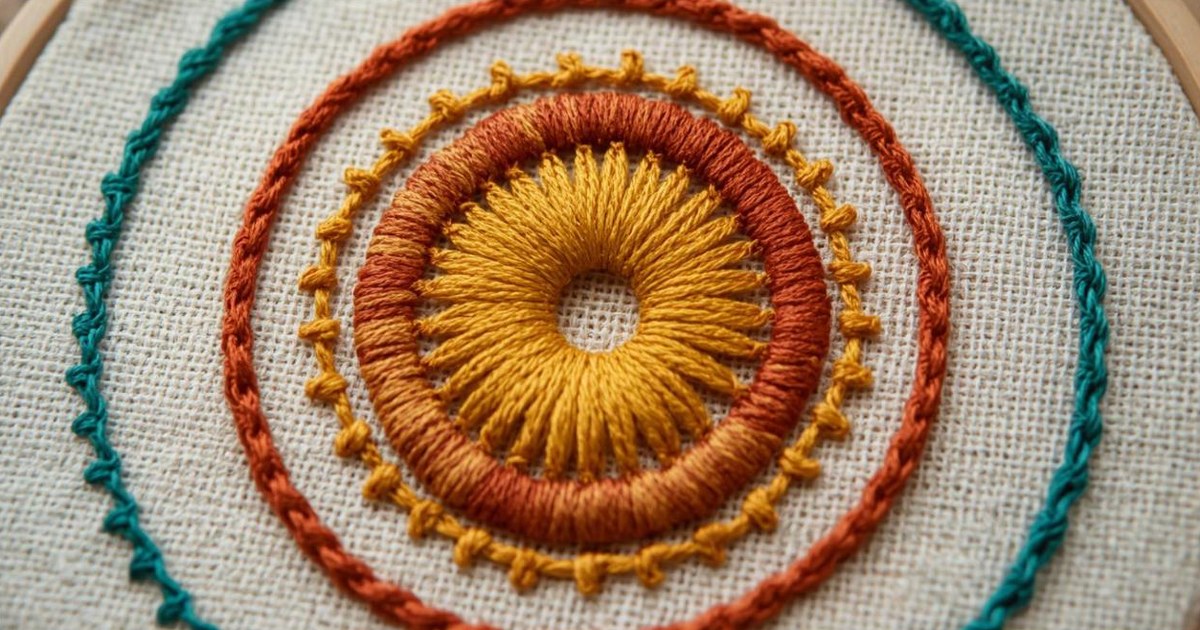
Quick answer: To embroider a perfect circle, trace a round object (such as a coin, cup or bottle cap) onto your fabric with a water-soluble pen. Stitch around the line with short backstitches, split stitches or stem stitches, about ⅛ inch (3 mm) long, so the curve stays smooth. To fill the circle, outline it first, then fill it with satin stitch for small circles or with rows of chain stitch or long-and-short stitch spiraling inward for larger ones.
Circles show up everywhere in embroidery: flower centers, polka dots, suns, moons, eyes and wreaths. They're simple shapes, but getting them truly round takes a few tricks. Here's how to embroider a smooth circle, both as an outline and as a solid fill.
What You Need
- Fabric in a hoop
- Embroidery floss and a needle
- A round object to trace (coin, button, cup or lid), or a circle template
- A water-soluble or heat-erasable pen
How to Embroider a Circle Outline
- Trace the circle onto the fabric with a round object.
- Choose your stitch. Backstitch gives a clean line, split stitch gives a smooth textured line, and stem stitch gives a flowing, rope-like line.
- Keep stitches short. The smaller the circle, the shorter the stitches. For a circle under 1 inch, use stitches of about 1/16 inch (1.5 mm).
- Follow the line exactly and rotate the hoop as you go so you're always stitching in a comfortable direction.
- Close the circle by ending the last stitch in the hole where you started.
How to Fill a Circle
- Satin stitch (small circles): outline with split stitch, then lay parallel stitches across the circle, starting in the middle and working out to each side.
- Spiral fill (larger circles): work rows of chain stitch, split stitch or stem stitch in a spiral from the outer edge toward the center.
- Long-and-short stitch: for shading and color blending in larger circles.
- French knots: cluster knots to fill a circle with texture, like a flower center.
- Woven wheel (spider web rose): make 5 spokes and weave over and under them for a raised round rose.
Tips for Perfectly Round Circles
- Use a template. Freehand circles are rarely even.
- Shorter stitches make smoother curves.
- Keep the fabric drum-tight so the shape doesn't distort.
- For satin-filled circles, angle the first stitch through the center and keep the following stitches parallel.
- Outline before filling for a crisp, raised edge.
Frequently Asked Questions
What is the best stitch for embroidering a circle?
Split stitch and stem stitch create the smoothest curved outlines. Backstitch works too if you keep stitches short.
How do you fill a large circle in embroidery?
Use a spiral of chain or split stitch, or long-and-short stitch, instead of long satin stitches that can snag.
Why does my embroidered circle look jagged?
The stitches are too long for the curve. Shorten them and stitch slowly around the line.
How do you draw a perfect circle on fabric?
Trace around a coin, cup, lid or circle template with a water-soluble pen.
Master Smooth Curves
Once you can stitch a smooth circle, you can embroider flowers, suns, wreaths and much more. Practice with our guides to chain stitch, satin stitch and how to embroider a star.
Prefer finished embroidery? Shop our embroidered T-shirts.