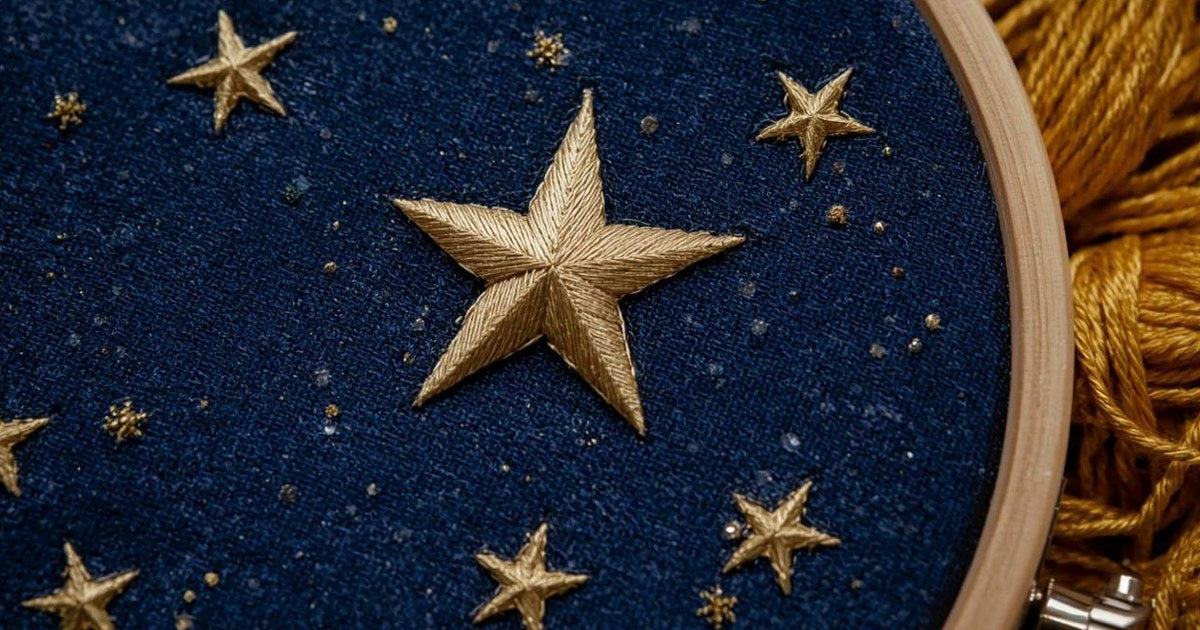
Quick answer: To embroider a simple star, mark five evenly spaced points on a circle and draw a five-point star by connecting every second point. Outline the star with backstitch or split stitch, then fill it with satin stitch worked in sections, one point at a time. For a tiny star, make a "star stitch": four or more straight stitches that cross at the center, like an asterisk, finished with a small tacking stitch or French knot.
Stars are one of the most popular embroidery motifs. They're perfect for night skies, baby gifts, celestial hoops and little accents on jeans and jackets. Here are three easy ways to embroider a star, from tiny sparkles to bold filled stars.
What You Need
- Fabric in an embroidery hoop
- Embroidery floss (gold, yellow, silver or white are classic star colors)
- An embroidery needle
- A water-soluble pen and a ruler or star template
- Optional: metallic floss for extra sparkle
Method 1: Outline Star (Backstitch)
- Draw the star. Mark 5 evenly spaced points around a small circle (72° apart), then connect every second point, or simply trace a star template.
- Backstitch the outline with 2–3 strands of floss.
- Make sharp points. End a stitch exactly at each tip and start the next stitch from the same hole so the point stays crisp.
Method 2: Filled Star (Satin Stitch)
- Outline the star with split stitch for a raised, clean edge.
- Fill one point at a time. Work satin stitches from the center line of each point out to its edges, angling them toward the tip.
- Keep stitches short and close so no fabric shows through.
- Optional: divide each point down the middle and stitch each half in a slightly different shade for a 3D, faceted look.
Method 3: Tiny Star Stitch (Sparkle Stars)
- Make a vertical straight stitch.
- Cross it with a horizontal straight stitch of the same length.
- Add two diagonal stitches to form an eight-point star, like an asterisk.
- Tack the center down with a tiny stitch, or add a French knot in the middle.
This is the fastest way to scatter small stars across a night-sky design.
Design Ideas With Stars
- Night sky hoop with a crescent moon and scattered star stitches
- Constellations made from French knots joined with backstitch
- Shooting star with a satin-stitch star and running-stitch trail
- Small gold stars on a denim jacket collar or jeans pocket
Tips for Neat Stars
- Use a template so all five points are even.
- Use fewer strands for small stars and more for bold ones.
- Metallic thread tangles easily. Use short lengths and a larger-eye needle.
- Keep the fabric drum-tight to avoid wobbly lines.
Frequently Asked Questions
What is the easiest way to embroider a star?
The star stitch, made of crossing straight stitches, is the quickest. For a classic five-point star, backstitch the outline.
What stitch is best for filling a star?
Satin stitch, worked one point at a time, gives a smooth, solid fill.
How do you get sharp star points?
Finish a stitch exactly at the tip and start the next stitch in the same hole. For satin-filled stars, angle stitches toward the tip.
What thread makes stars sparkle?
Metallic embroidery floss or blending filament mixed with regular floss.
Reach for the Stars
Stars are a quick, satisfying motif for beginners and a great way to practice outlines and fills. Learn the basics in our guides to backstitch, satin stitch and French knots.
Looking for a ready-made gift? Explore our personalized embroidered gifts.